Silicone-impregnated (read: coated on both sides) nylon is one the of most significant outdoor gear innovations of the last 15 years. Previously polyurethene (PU) coated fabrics were the only game in town. PU tends to be heavier, and degrades significantly when exposed to UV light and abrasion. Floor delamination was a common cause of tent retirement, often happening when everything else was still in good shape. Silnylon has a much longer service life, is lighter, and is relatively inexpensive.
One major downside is that no one has yet invented a tape which can be used to waterproof the seams of a silnylon shelter, so you’ll have to do it yourself. The following technique is in my opinion by far the best, and as discussed has other uses beyond seam sealing.
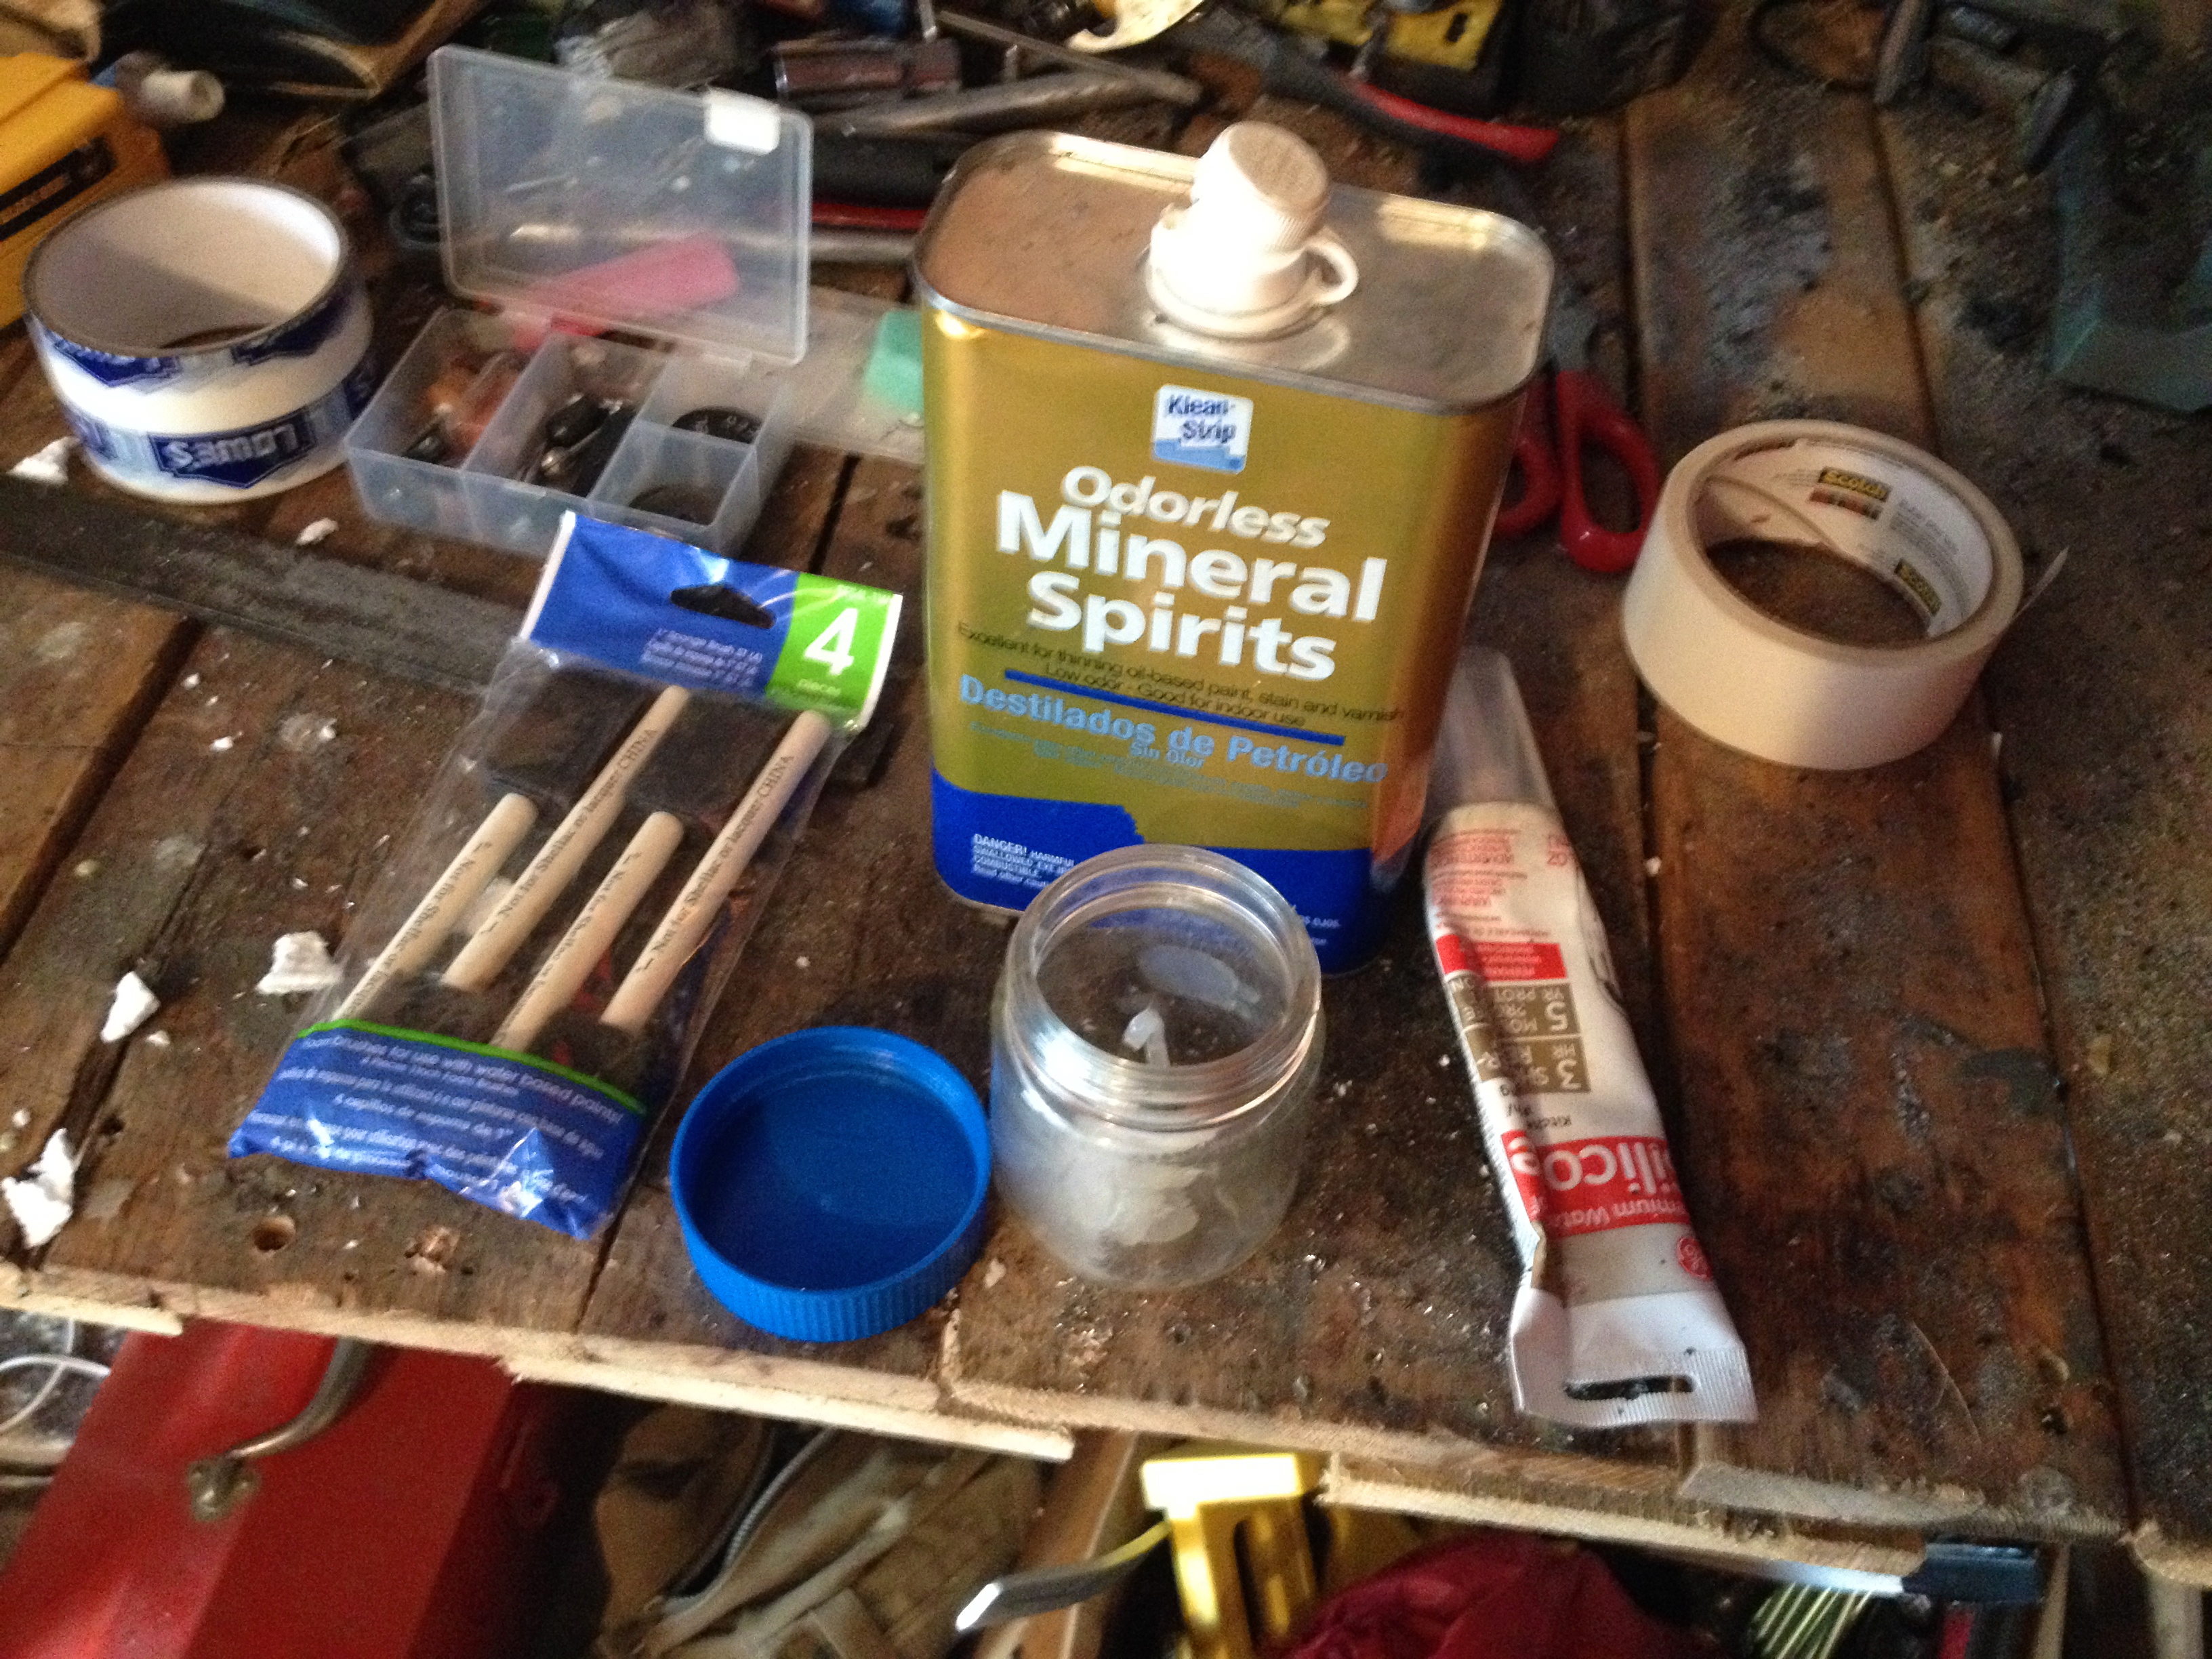
Pictured above is everything you’ll need aside from the shelter in question: mineral spirits, clear silicone sealer, a small glass jar with a lid, and a small foam paint brush. You must use traditional mineral spirits. The idea here is that the spirits dissolve the silicone, it is painted into the seam in suspension, and becomes part of the shelter as the spirits evaporate. I bought non-toxic pseudo-spirits once, and they did not dissolve the silicone. Same story with various forms of alcohol.
The first step is to squeeze out a good dollop of silicone into the jar, then add mineral spirits (I use a 1:5 ratio, approximately), close the lid, and shake vigorously for a few minutes until the silicone is completely dissolved.
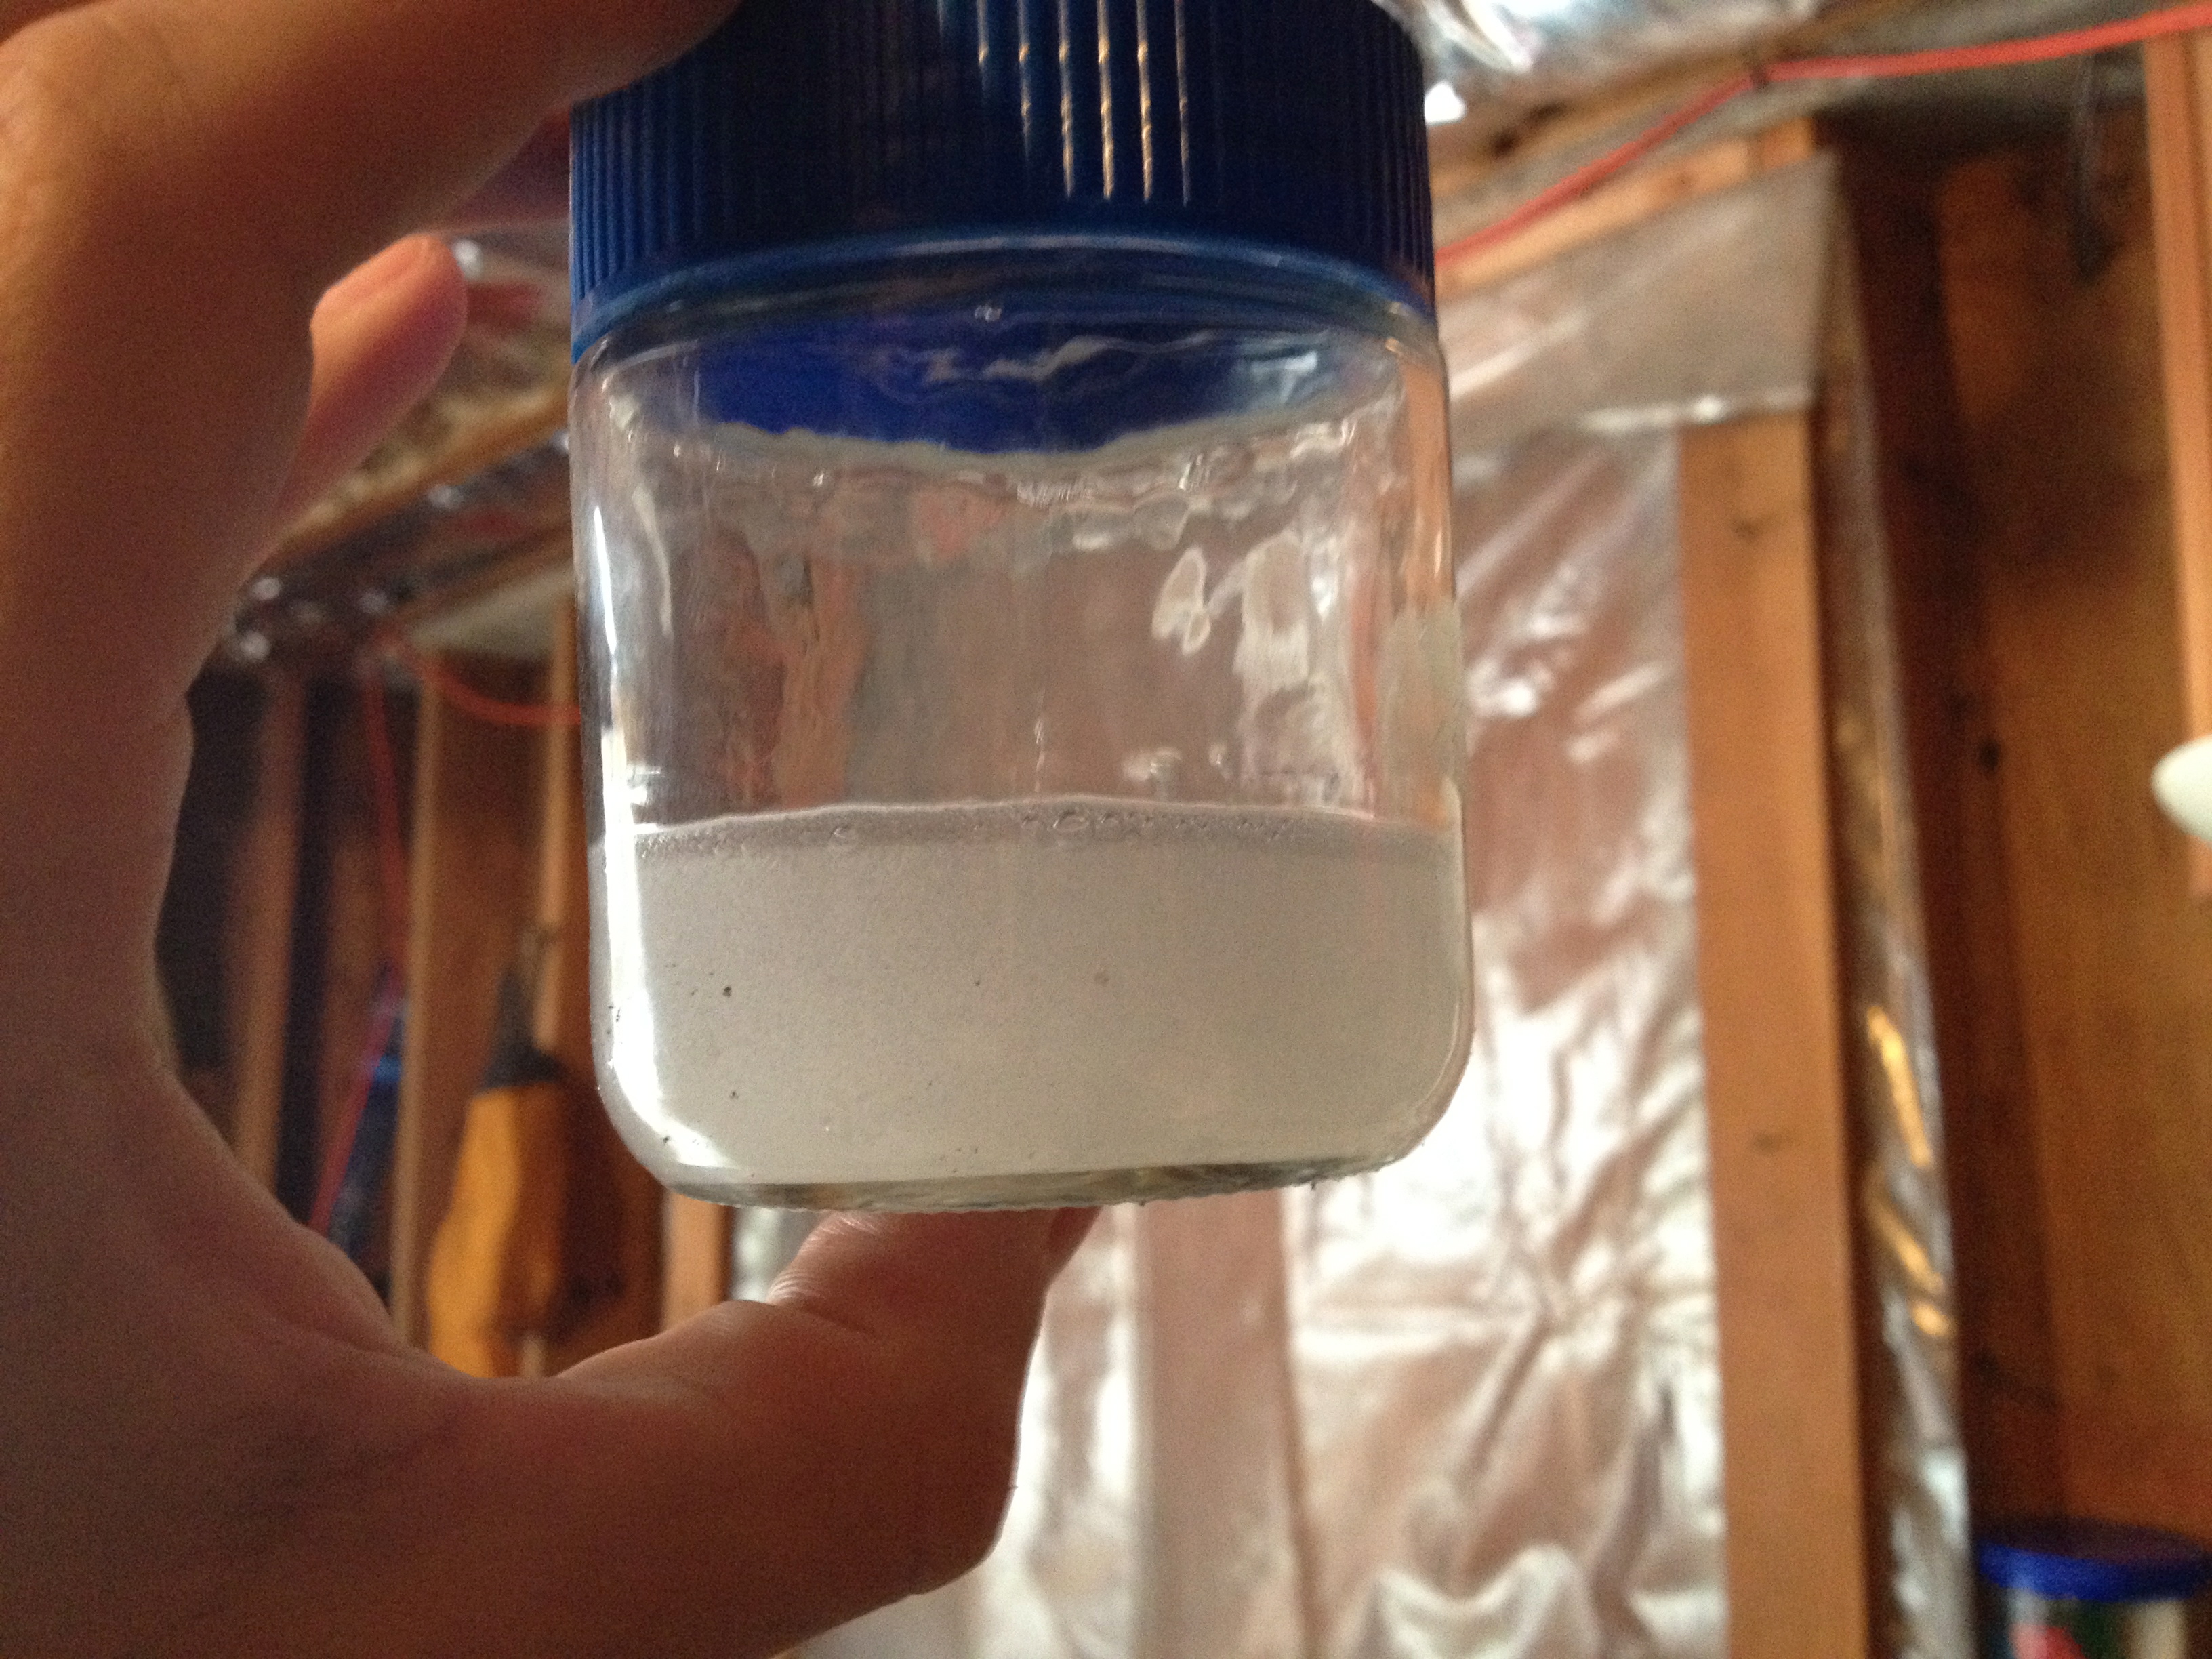
The result should look like this, an opaque liquid which is a fair bit thicker than water, but still far from being a paste or gel. Once this is achieved, simply paint the mixture into the seams with a foam brush. A little goes a long way, but use a bit of pressure and back and forth to work it into the stitches and folds in the seam.
Obviously, you want to do this on the outside of the shelter.
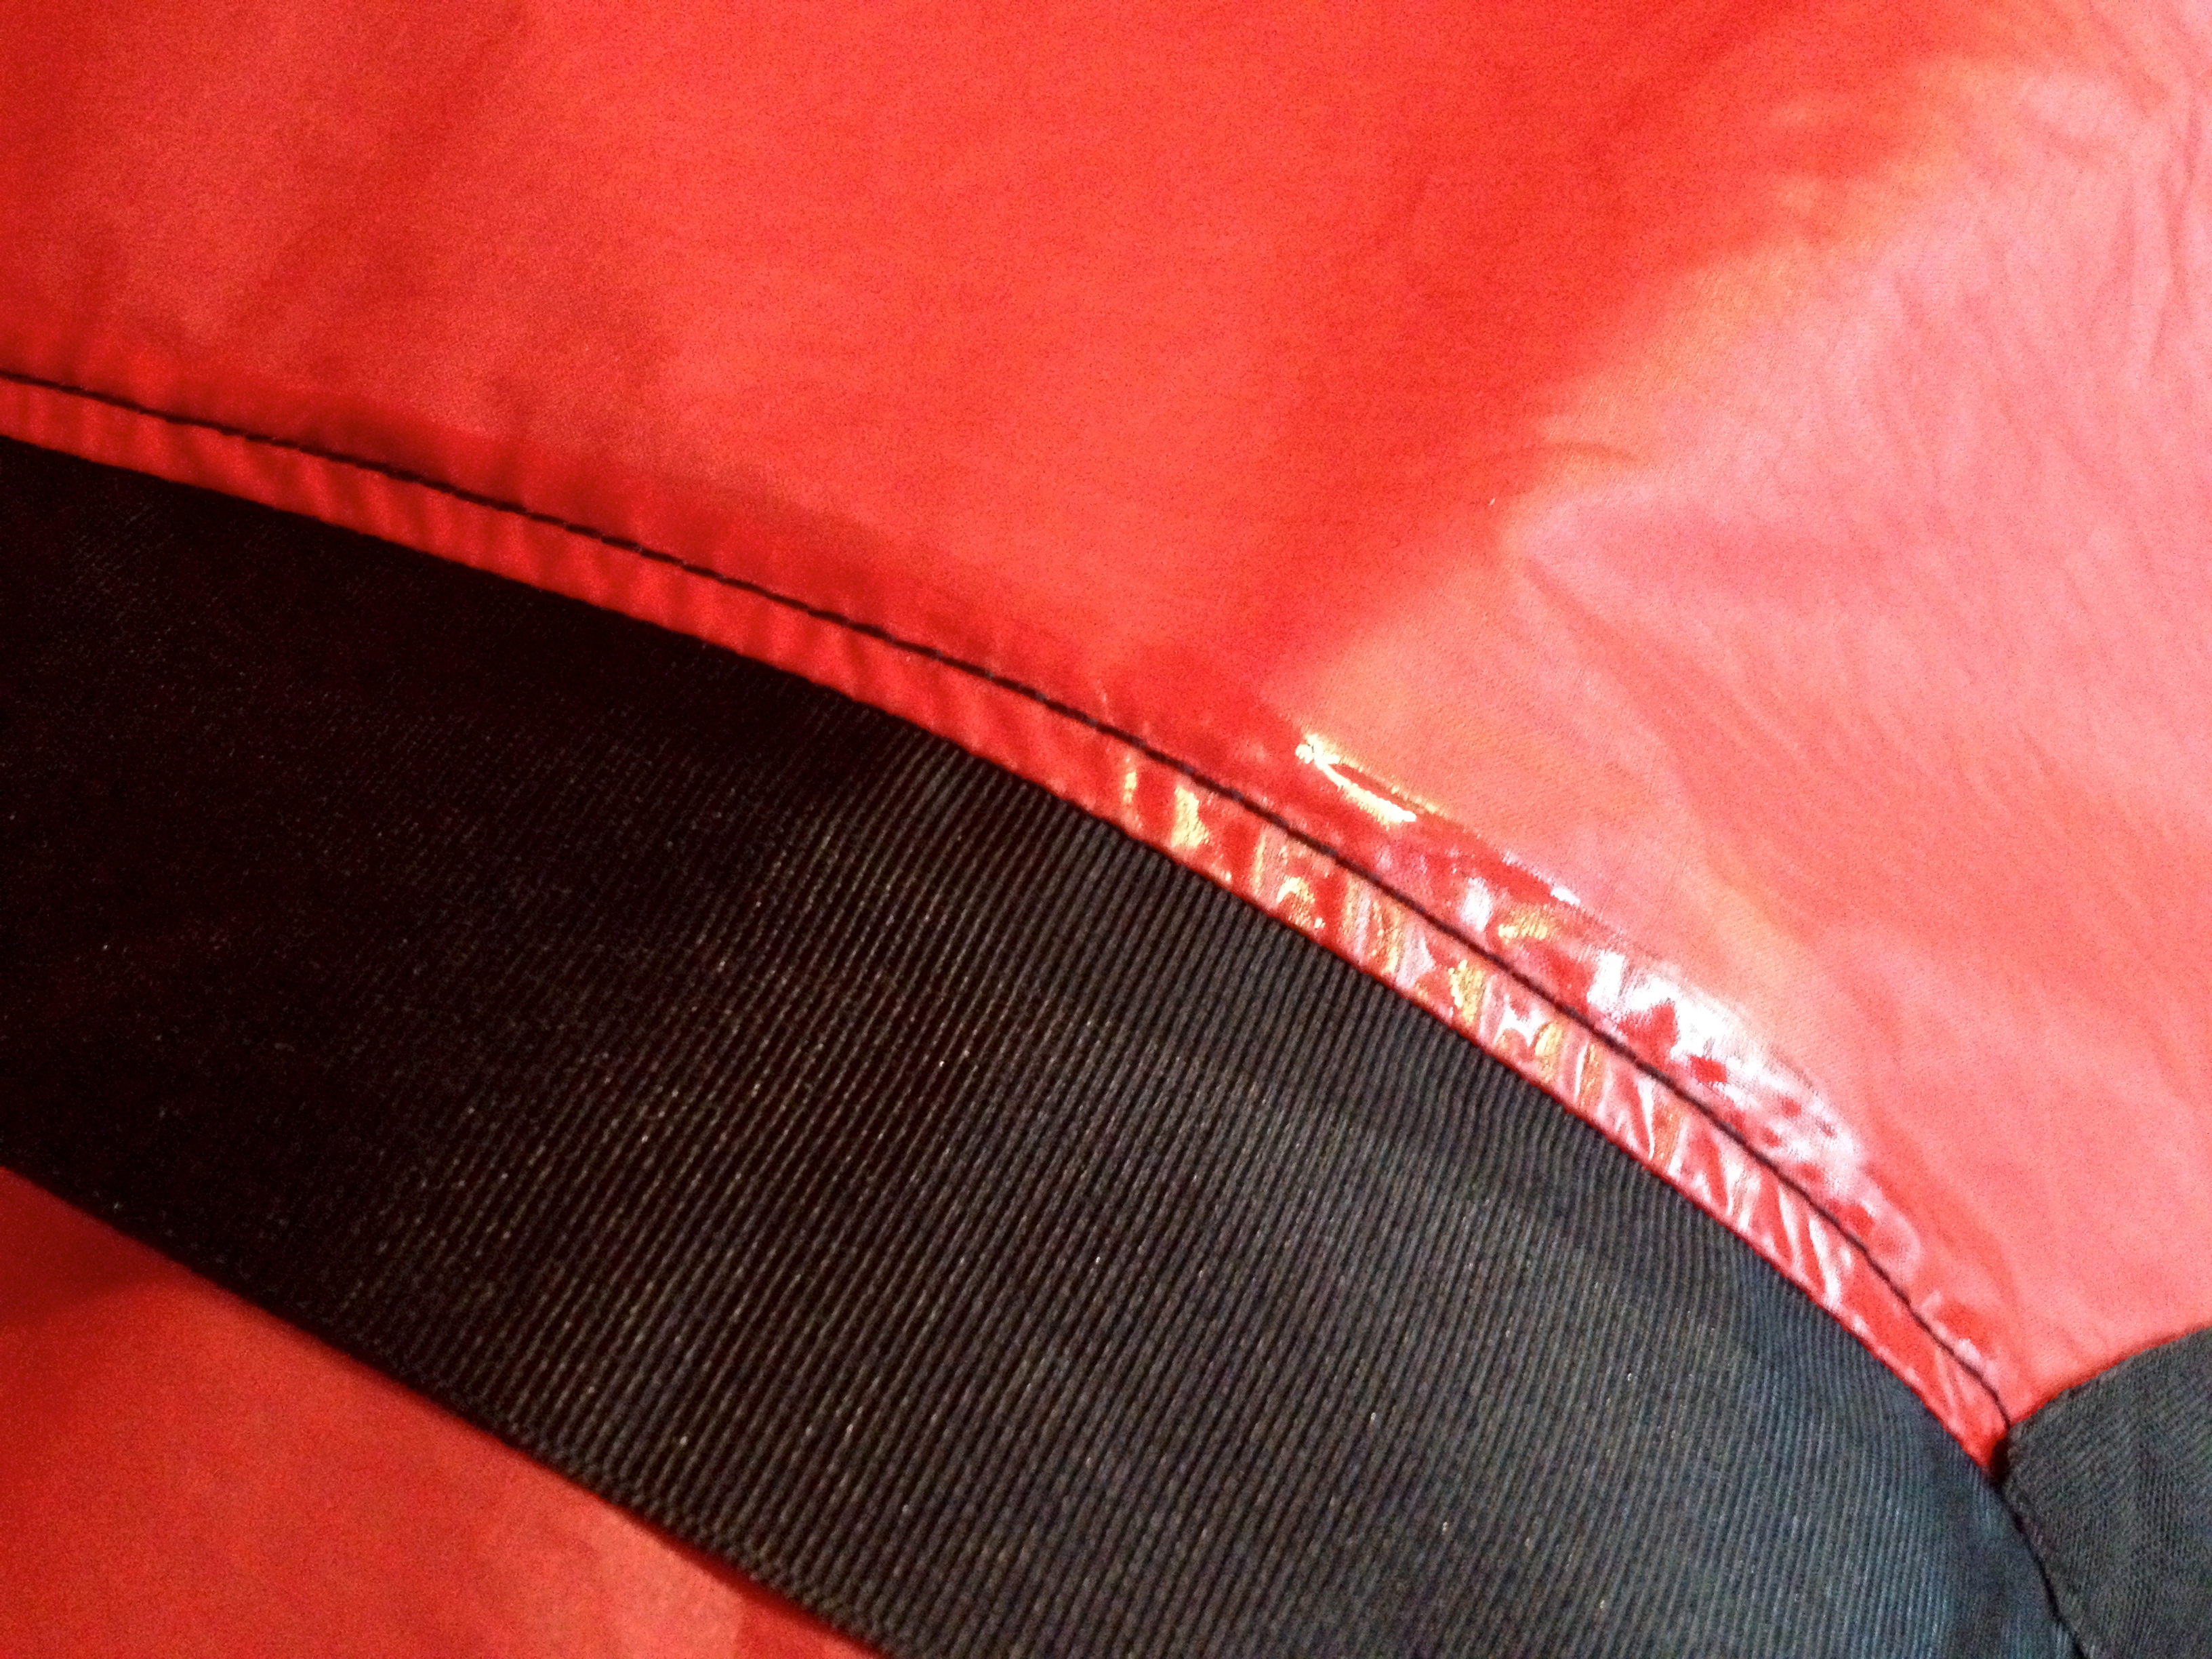
Once you’ve gone over the seam and it’s had ~10 minutes to dry, it should look like this. The sealer will cure to the touch in a few hours, and completely within 24. By that time the sealing will be all but invisible. This technique adds far less weight, and is far faster and cleaner than using the Silnet sealer sold in outdoor stores. If your shelter came with Silnet you can thin it down using this procedure, just use a bit less mineral spirits.
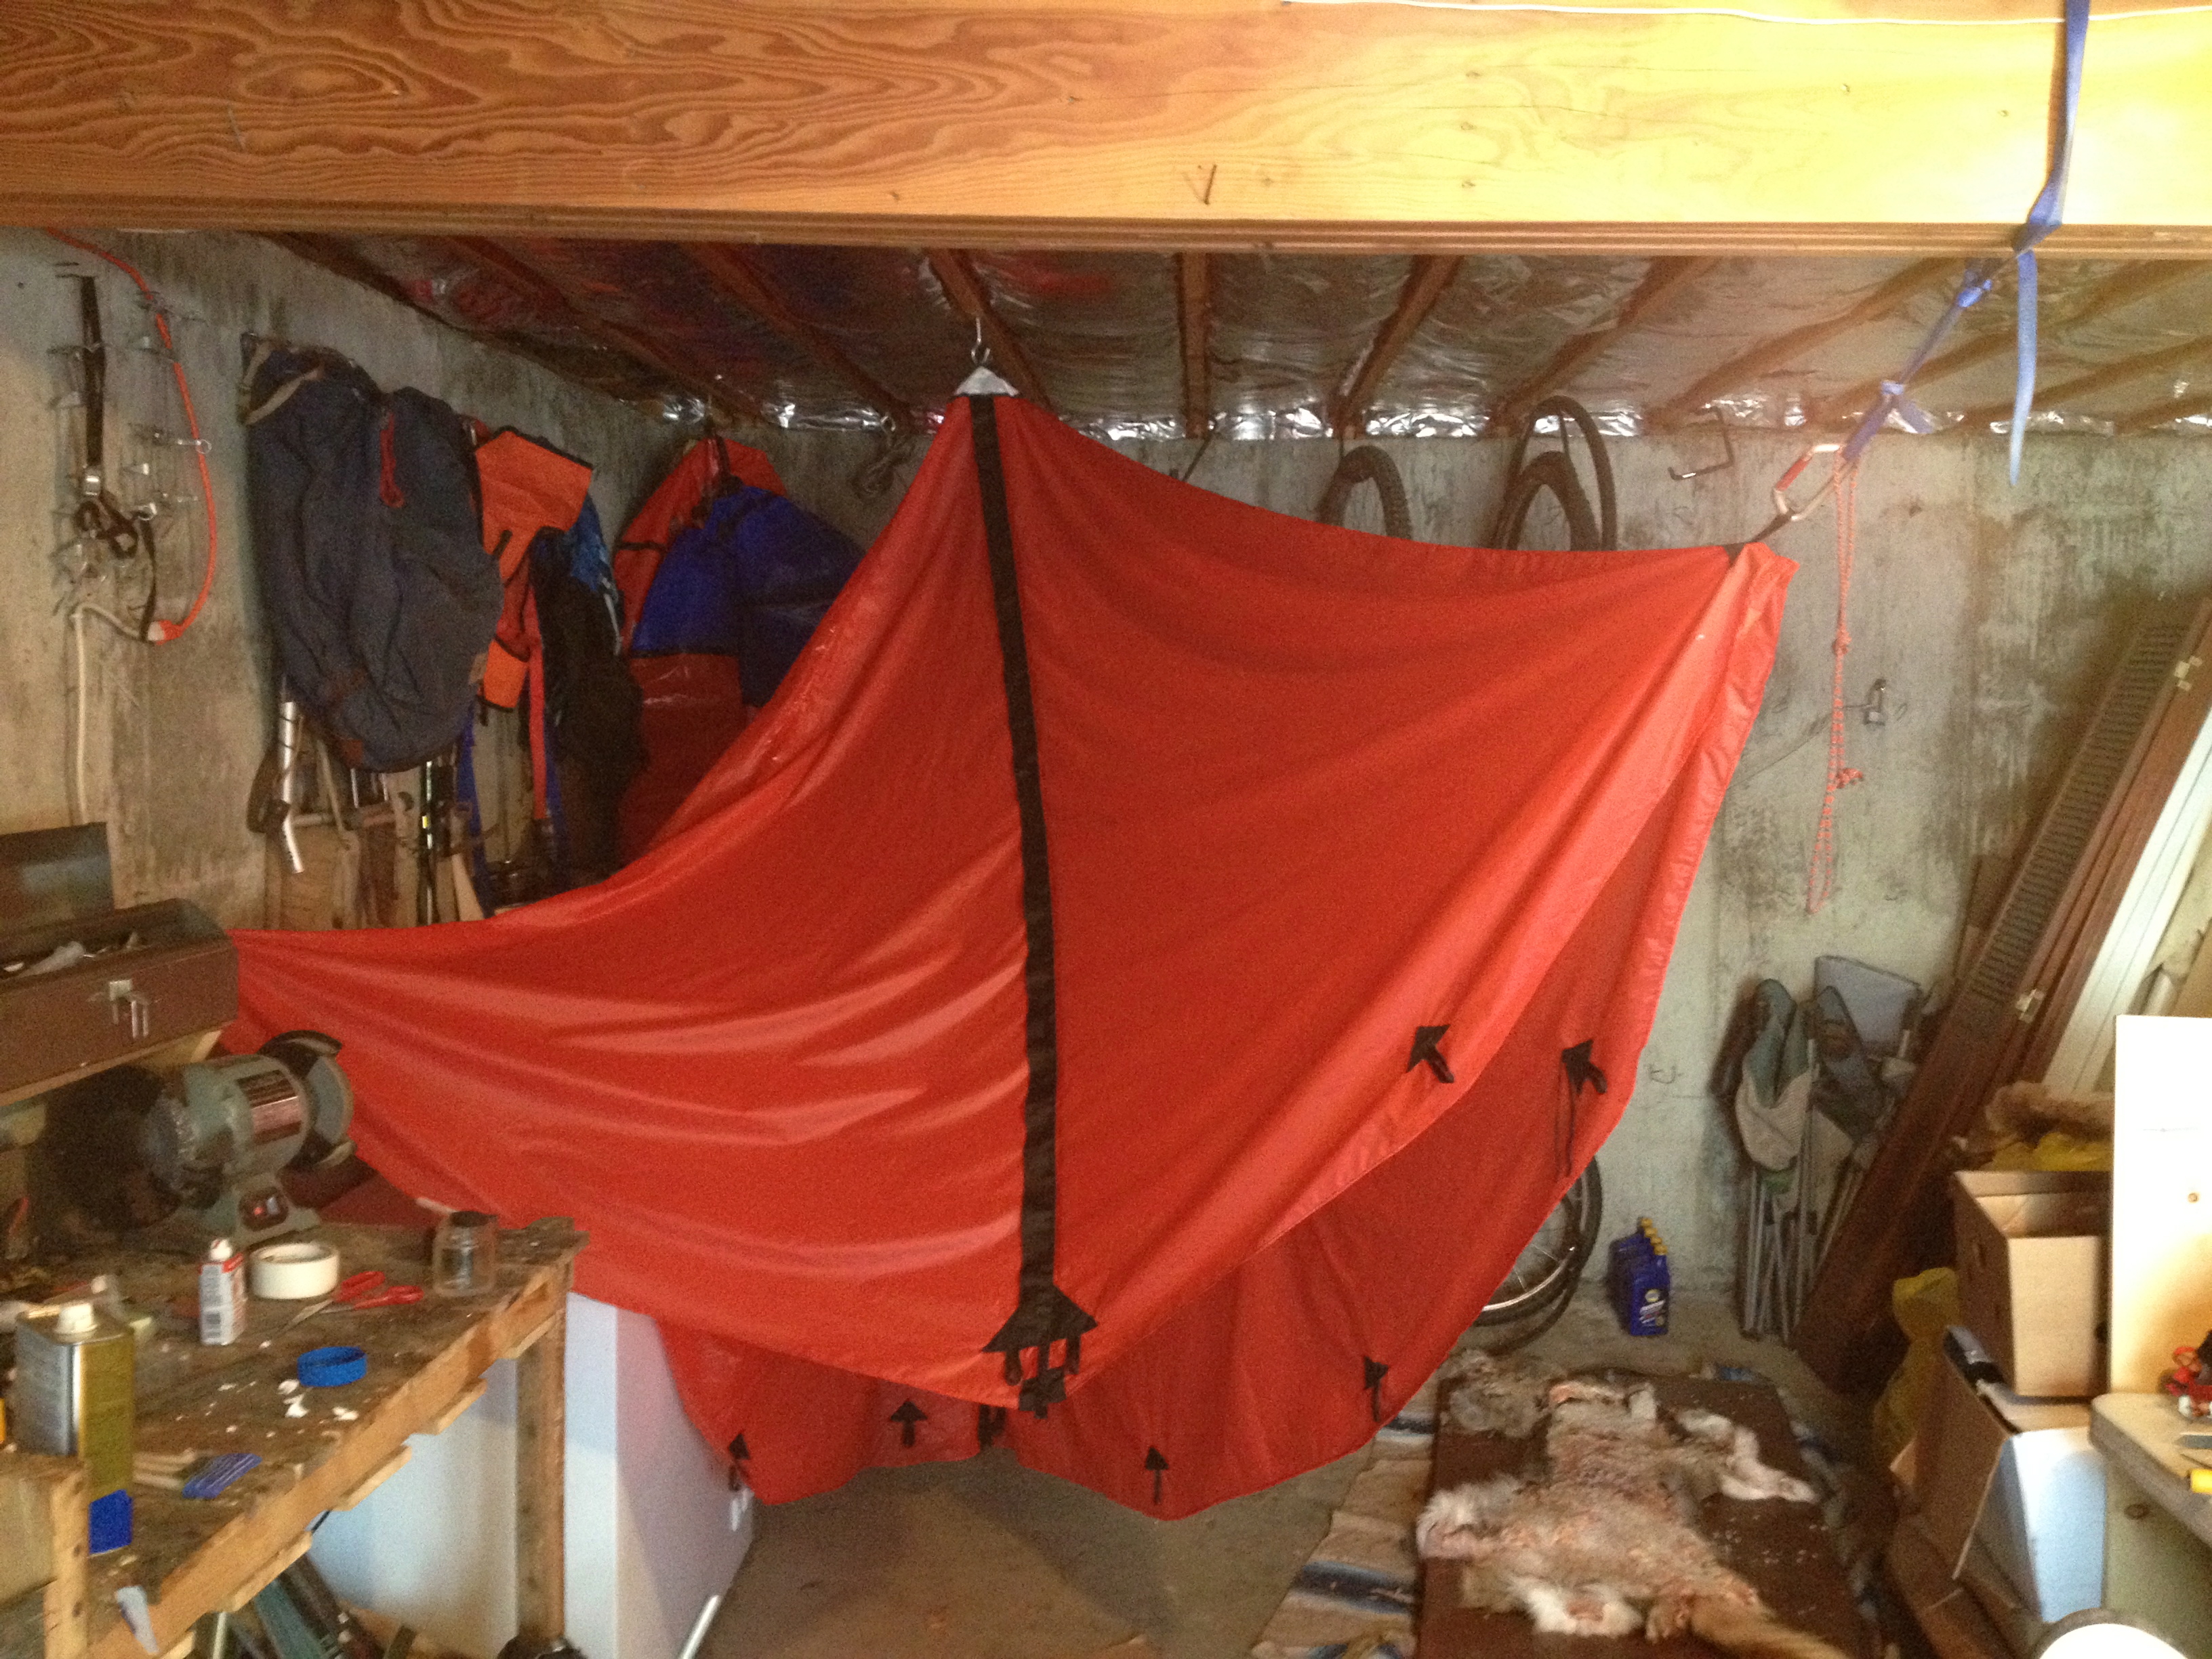
Seam sealing in winter comes with a few challenges. First, silicone cures best in warmer temperatures, so even if you have a clear day to work outside it’s best to do it indoors unless it’s quite warm. You want dry air and temps above 60F. Second, the fumes here are not too noxious, but it’s ideal to have a heated yet well-ventilated space like a garage or basement with a large door. Third, you need to figure out a way to keep the seams hanging free of folds for their full length while they cure. Setting up the shelter properly with full tension can make things easier, but is not necessary.
Lastly, this technique can be used to enhance to rebuild the waterproofing of a silnylon shelter. The silicone coating will degrade over time, faster with heavy use, and it’s conceivable that well-traveled shelters, especially those seeing lots of the UV exposure and even more especially those made from lesser quality sil will mist under heavy, windblown precipitation. Misting is of course a polite term for diffuse leaking, which is not desirable. Not all silnylons are the same, and without diving into the miasma which is hydrostatic head figures, it is fair to say that some companies charge more for their product because they use better materials. Feel the material; the waxier, thicker, more substantial coatings of good silnylon is easy to recognize. The more crinkly the fabric, the worse it probably is in this respect. Thankfully, if you bought a shelter with less-than-ideal materials you can easily bring it up to snuff by using the above method to make a lot of formula, and painting the whole shelter.
Have fun.

Leave a comment