The future of ultralight backpacks is a ~45 liter bag made of materials which will last multiple years under all but the most abusive use, carry 50 pounds easily, and weigh a fair bit under 2 pounds.

The future is just about here. I do need to bend the frame a bit to get those shoulder straps in better contact.

This is my latest build on the Paradox frame and hipbelt. This is the standard 24″ tall frame, which I’ve cut to be 3/4″ narrower than the stock 14. The belt is the same one I’ve used for almost everything over the past 15 months. The camo fabric is X33 (simply the best all-around pack fabric available today), the black VX42, the green check 210 denier gripstop from Thruhiker.

The baffled back pocket floats, only attached via the four compression straps. The Paradox talon system has made me a full convert to this feature; as you can use it to carry everything from a wet jacket to 5 foot pieces of firewood.

The solution to properly places compression straps and side pockets which are useful is to put a slot in the pocket. Compare the two preceding photos.
The parallel 3/8″ webbing daisy chains are an obligatory feature, they make secondary lashing of just about anything under the compression pocket possible, and facilitate ideal attachment to the bow of a packraft. The bartacks are sunk into a doubled patch of fabric inside the main bag, making for one layer of webbing and three layers of fabric, total. The fabric will fail around the tack before the stitching will rip.
My favored way to make pack bags is to use three pieces of fabric; one for the bottom, one for the back panel (against the user), and another for the sides and front. The seam between the later two, which seems to take the most stress, is triple stitched, bartacked in the right places, then felled and stitched and tacked again. The bottom pieces is sewn on last, and seam sealed fairly heavily by hand-rubbing Aquaseal in. The side seams are sealed lightly. I’ve gone to using full 1 inch seam margins for all of this, a big part of the motivation for which is that I’m finally, after 5 years and 30+ packs, making things I know I’ll want to have around for a long time.

The frame is held in place by the bottom flap. The flap is tiny, and more to put a layer between the webbing and the ground than anything else. The generous travel between flap and buckle allows the bottom to be sucked down aggressively, which is key to carrying heavy, dense, smallish loads (like game meat) properly. A single drain grommet is hidden behind the flap.
A three piece bag design like this one allows for limited options to manipulate the shape of the bag. From a design and construction standpoint it’s easy to just make a rectangular bottom, which also has the virtue of being easy to load as well as maximizing space in the bag. A squared-off bottom also hangs up on ledges and logs as you’re climbing around, as is high on my list of most-hated backpack features. It should surprise no one that this list is not short.
It’s difficult to see, but the bottom of this pack is tapered both in and up. The bottom edge in the above photo is 13″ wide, finished. The top edge is 10″. More hidden is the three inches of vertical rise between the same two points, which over the six inch depth of the pack at the bottom is quite a lot. The cumulative effect can be seen in the first two photos: the pack lack hard edges in any direction. Such a design is harder to pack well with rigid objects, but is also much less likely to get caught on stuff out there in the wild.

It seems I always come back to a drawstrong top with a single top strap (two for packs in excess of 40″ upper circumference) as the most utilitarian closure. It’s simple and maximizes space, and allows odd things like paddle shafts and deer hooves to stick up and out as needed.
A top strap with a hook buckle is darn handy. This one can be attached to either the loop on the bag or the loop on the pocket, without any extra buckles flapping around.

To help this one be a bit more waterproof, I slanted it a bit. The user-side edge is 3 inches taller, and can be folded over a bit when the pack is full. I don’t fuss about an absolutely waterproof pack, just one which keeps most precip out and gains minimal weight in the process.
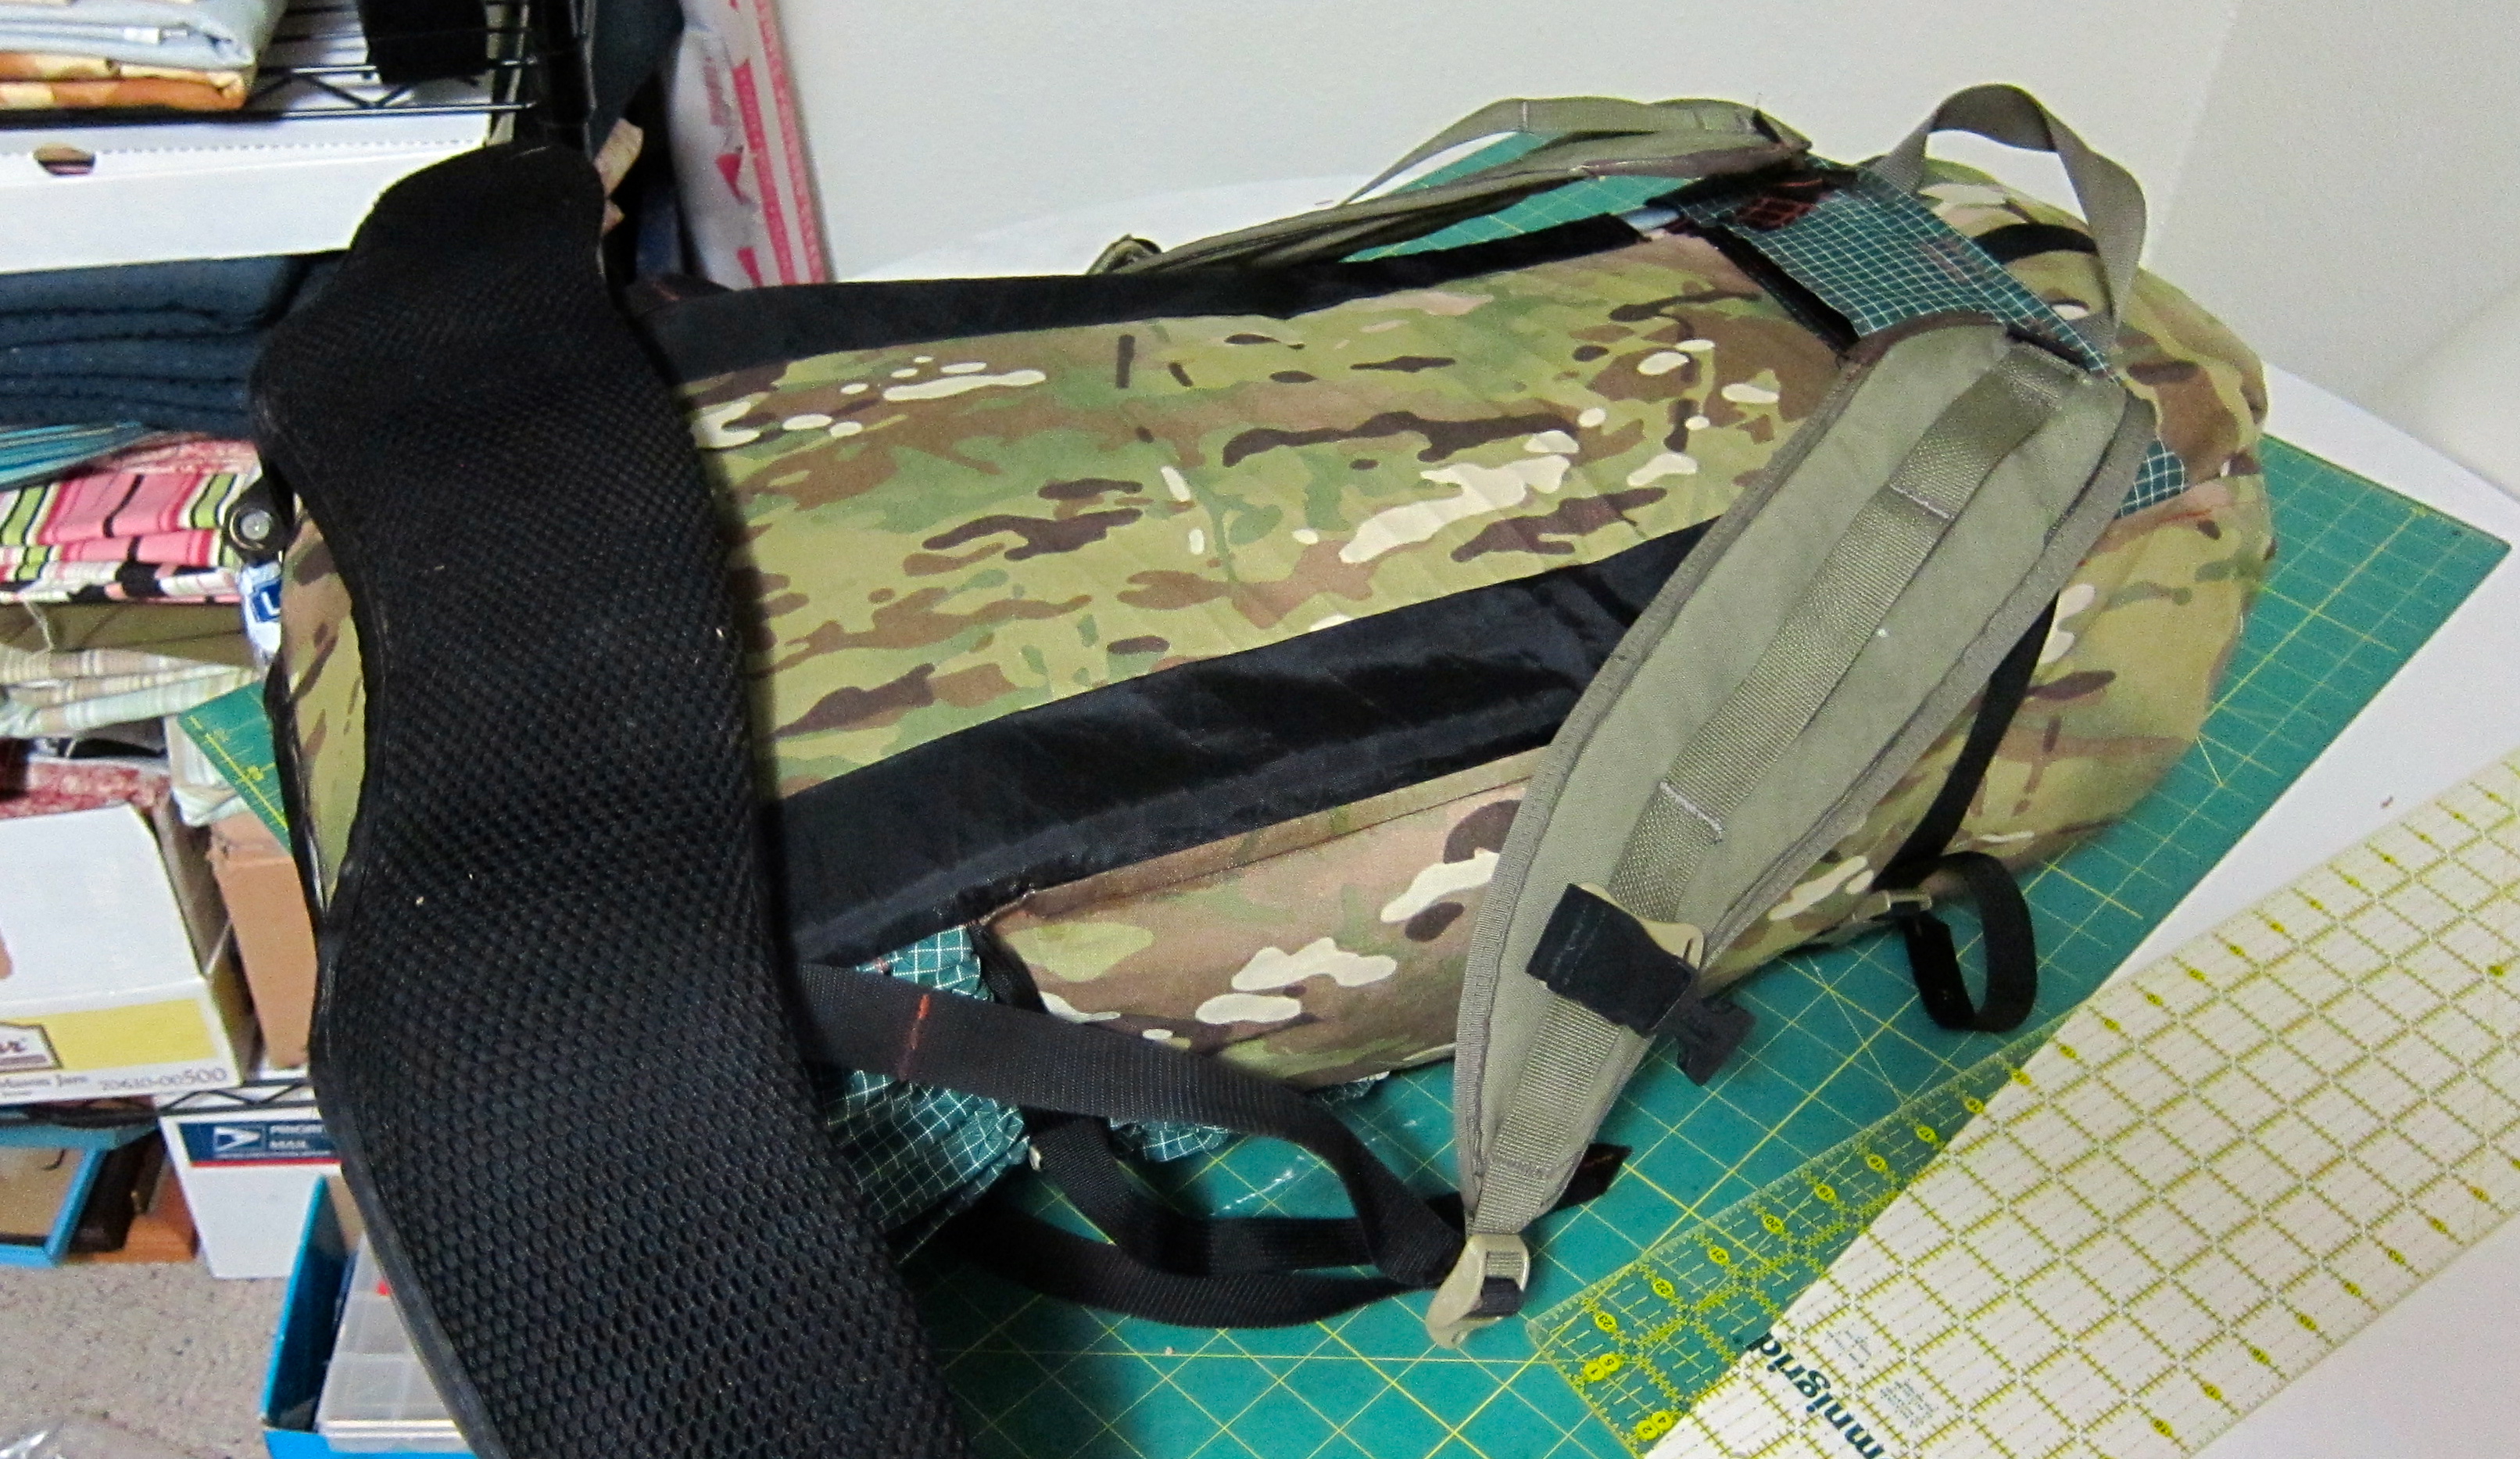
The key to all of this is of course the Paradox frame. The VX42 sleeves seen above, and the double layered (inner VX42, outer gridstop) pockets at the top are the only things added to the basic bag. Minimizing the extent and weight of frame-related elements is the key to making a truly light pack which can carry a lot of weight.
Start with the Mountain Laurel Designs Prophet, a bag similar in size and features to the one shown here and generally regarded as the pinnacle of frameless rucksacks. The Prophet is made of a lighter main material, similar shoulder straps, and with no frame whatsoever. The Prophet is claimed at 16 ounces. The next step up in the comparison are packs like the Gossamer Gear Gorilla, ULA Ohm, and HMG 2400 series. As I detailed earlier today all are around the same size, have similar features, and possess suspensions which cost a similar increase in weight over the Prophet (~14 ounces). I have reason to suspect that the 27 ounce total weight I originally quoted for the pack pictured here is inaccurate (our postal scale has finally gone round the bend), but I do know that stepping up to a comparably sized pack which matches or exceeds the load capacity requires an exponential increase in weight. To wit, the now discontinued Timberline 3 from Kifaru, which weighs 4.5 pounds.
I’ve used this pack to pack out two deer (albeit modest distances), and thus know that it takes loads a good deal above 50 pound to render the lack of load lifters a problem, given that the torso is properly sized. That there is nothing more than a single layer of fabric between your back and the cargo demands a similar packing style to a frameless pack, you just have considerably enhanced load bearing ability and a massively supportive belt to go along with it. I’ll probably use it for the Bob Open next year, day hunting next fall, any backpacking which doesn’t involve a massive load, and a few gear intensive daytrips. This pack feels like the culmination of years of work, and a truly large step above that first pack back in the day.
It is, as they say, shit that works.

Leave a comment